Building
Every step to build your prototype.
Steps
1. Assemble The Monitor Stand.
The Monitor Stand should Screw itself, easily the arm already comes assembled, just place it and tighten it with a bolt. The mounting plate easily screws on.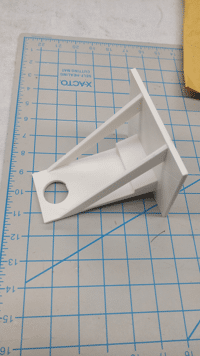
2. Make a monitor stand or 3D Print one Here.
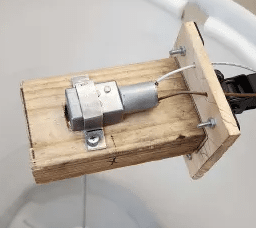
You can make a monitor stand with a 1/4 or 1/8 of an inch wood and a 2x4 with a drill bit or other device cut an inch hole on the 2x4 for the coupler.3. Attach the Coupler to the motor on one end and the Shaft on the other.
Attach the 1/4" shaft on one side of the coupler and the motor on the other tighten it with the allen key provided with your couplers.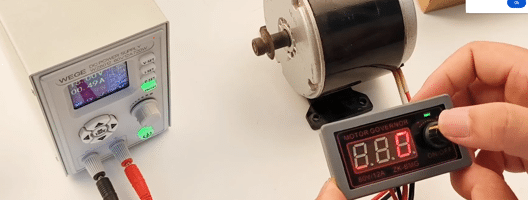
4. Cut the power brick cable, and place two ends on the PWM Controller
Unscrew with a flat screwdriver and place stripped cable on corresponding side red is positive ground is black. Get two extra cables from anywhere and tape them with electrical tape to the motor pins one side will make it CCW and the other CW.5. Plug the power brick in and turn on the PWM Controller.
Now you can control the RPM by controlling the Voltage going into the motor.
Optional
Optional Steps
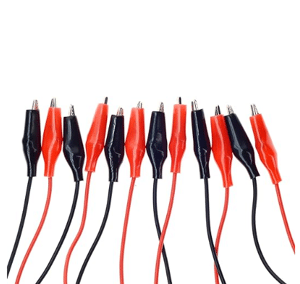
Attach Alligator Clips or solder the cables into the motor pins.
Connecting the cables to the motor with just electrical tape can be iffy so alternatively you can buy electrical tape or solder them into the Motor pins.
3D Print or Make a Shaft base support.
Since the propellor tends to exert force into the shaft causing it to wobble to combat this, 3D print or make a shaft support with wood. It can be glued tape or drilled to the bottom.